Thank you for sharing this video, Moshe! I truly enjoy watching Paul’s videos–no doubt, any radio turned over to him is in expert hands. I love how he explains, in such detail, each action he takes to restore and repair these vintage radios.
Many thanks to SWLing Post contributor, Arthur Smith, who shares the following guest post:
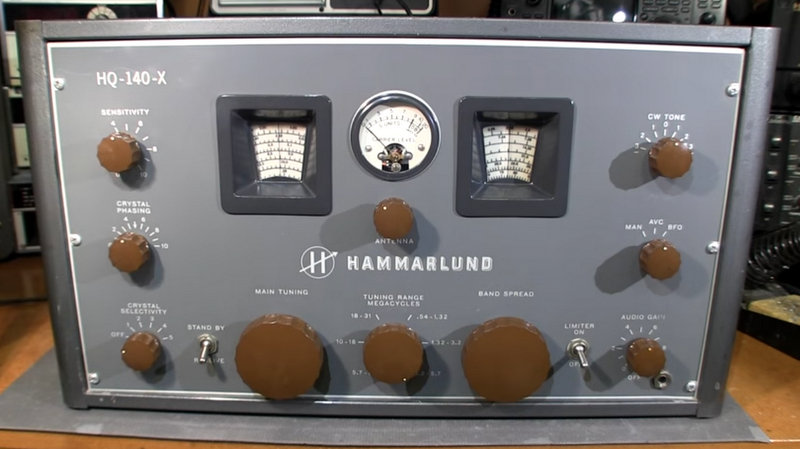
The Story And Restoration Of My Hallicrafters SX-42
by Arthur Smith
As a junior high student way back in 1978, I had a natural interest in radios. My dad was a ham radio operator, electronics engineer, and designer. We always had cool, exotic radios and electronic gadgetry around the house. He was also in the Korean War, in the US Army Corps of Engineers, with access to a wide variety of equipment. He often told me the story of how he became interested in radio at an early age, and how he saved up for expensive radio gear, with a little help from my grandparents. Back in 1946, Hallicrafters was THE brand to own, and their postwar designs from Raymond Loewy, were catching the eye of many enthusiasts. The SX-42 was being hyped up in Hallicrafters ads as the ultimate radio to own, one that could tune the shortwave and ham bands, and beyond. I don’t know the complete story, but prior to acquiring his SX-42, my dad also purchased an S-38 and S-40. Never satisfied with “good and better”, my father wanted “the best”. All 15 tubes and 50-plus pounds of boatanchor.
Always ambitious and industrious, he mowed lawns, repaired motorcycles, and did odd jobs for neighbors in his suburban Boston neighborhood. He worked smart, and worked hard. And that fall, bought his SX-42.
The radio, we think, was about $279, which would make it the equivalent of almost $3500 in today’s dollars. He heard the start of the Cold War, and the Soviet Union’s Sputnik. And the birth of Rock and Roll on FM! He graduated high school, went away to the Korean War, serving two Tours of Duty. He came back home, and became an electronics engineer. And a licensed ham radio operator.
Moving ahead to 1978, and yours truly had the radio bug, in the worst way. Not as ambitious or as savvy as my father, a classmate, who was also a ham radio operator, told me about a National HRO he had, with some coils, and maybe needing some work. My Dad came home from work, and I just had to tell him about this great opportunity, which of course, would require his financial backing. At this point, the SX-42 and his other two Hallicrafters were seeing “backup” duty, having long since gone solid state in his post. “Hey, I’ve got an idea!” When a Dad says that, a son usually wants to run. Not in this case. “How about we give you my SX-42?!” Gee, twist my arm. I had loved watching those mesmerizing green back lit dials, S meter, and geared tuning knobs. Unfortunately for my classmate, he had to keep his National. Fortunate for me, I had my father’s SX-42!
That radio logged my first 100 countries, including QSL cards from countries and stations no longer in existence. It heard the fall of the Berlin Wall. And, it was at the heart of my school Science Project, which made Science Fair, featuring an experiment on longwire shortwave radio reception.
Years later, the focus became family, a child, and a house. The SX-42 and siblings came with me, but this time, in boxes. After having seen a WW2 vintage Hallicrafters S-20R at a consignment shop a couple of summers ago, I thought how cool it might be to have Dad’s radios electronically and cosmetically restored.
The S-38 and S40 were in a box in my damp basement. While intact, they had a considerable amount of rust. Luckily, I was able to find a gentleman with great electronic and mechanical skills. He brought the S38 back to life, working and looking beautiful. And is working still on the S-40. As for the SX-42, that was upstairs in a box in my son’s closet. Dry and somewhat preserved, but with some corrosion on the control panel. And sadly, that iconic lock knob that switches between main tuning and brandspread tuning, had been lost in the move. I had to find someone who could take this project on.
After an extensive search, I found my man. An engineer with his own business, who was moving into retirement, and shutting his business down. He had restored an SX-42 a few years back, with amazing results. I had to lure him out of retirement! Which I did after a few emails back and forth. And, he was within driving distance! First warning was “do not power the radio back up under any circumstance- you’ll fry the wafers on the bandswitch!” I resisted temptation, as I had read online that these were notorious for failure, usually to some original capacitors that leak over the decades.
After 13 months replacing every capacitor, virtually every resistor, and vacuum tube, the iconic radio was coming back to life, in a great way. The transmission and gears in the tuning was re-lubricated. During the restoration process, a date was found stamped on the chassis of October 25th, 1946. Could it be?
Hallicrafters had advertised in the Oct, 1946 issue of Radio News that “The first hundred are always the hardest to build.” This, coupled with the fact that none of the chassis circuit had been modified, lead my restorer to believe that my radio was one of the first 100 SX-42’s that Hallicrafters had built!
The front panel was stripped and treated, professionally painted and silkscreened. The cabinet and apron bead blasted, repainted, and clear coated. It came back home with me last month. A month after it turned 70.
As you can see here, the radio looks stunning. And, with all the Hallicrafters Service Bulletin mods implemented, sounds and performs better than I remember. Maybe more importantly, we were able to locate a replacement brake lock knob for the tuning shaft, even with the “Lock” decal and arrow showing to rotate it counterclockwise. It just would not have felt complete without that little knob- and, it works!
Engaging a set of what essentially are brake pads, you rotate it once to disengage the main tuning and engage the bandspread tuning. Again, and you’re back to main tuning.
This radio will always remain a truly cherished family heirloom, and will be my son’s someday. Complete with the original owner’s manual, and Darth Vader-like R42 Reproducer (speaker).
Hopefully to live on for another 70-plus years, and hear more history along the way.
-Arthur Smith Worcester, MA
Wow–! Thank you so much for sharing your story with us, Arthur. No doubt, your SX-42 will certainly outlive all of us and will hopefully continue to be passed down through your family. What a wonderful story.
Many thanks to SWLing Post contributor, Rick B, who writes:
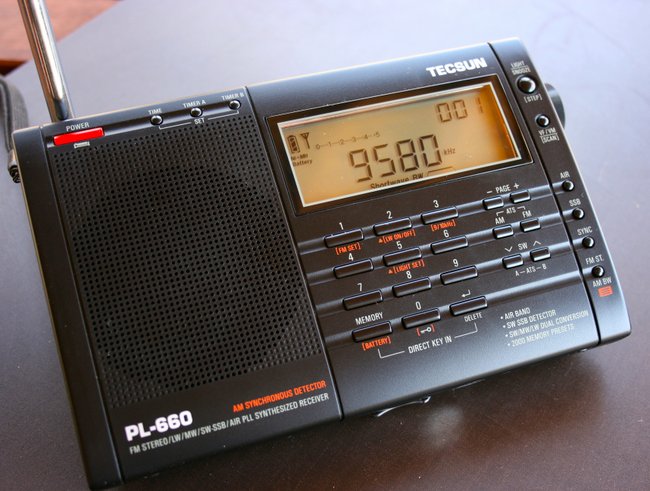
I just thought I’d share with you a hidden function I discovered documented on the web for the Tecsun PL-660. It’s how to calibrate the FM band if you have a radio that is off frequency.
As my current PL-660 is accurate on FM, I haven’t had to try this myself. But perhaps it could save someone else from having to return/exchange a radio.
“Re-calibrating FM, radio needs to be on and set to FM band. Tune to the desired frequency/station you wish to listen to, press “SYNC” for about 3 seconds back light will flash. Tune up until the frequency/station sounds more clear press “1” to confirm re-calibration. If done correctly the correct frequency/station will be displayed on the display. Keep the battery in for all the time…”
Many thanks to SWLing Post contributor, Cezar Vener, who writes with the following inquiry:
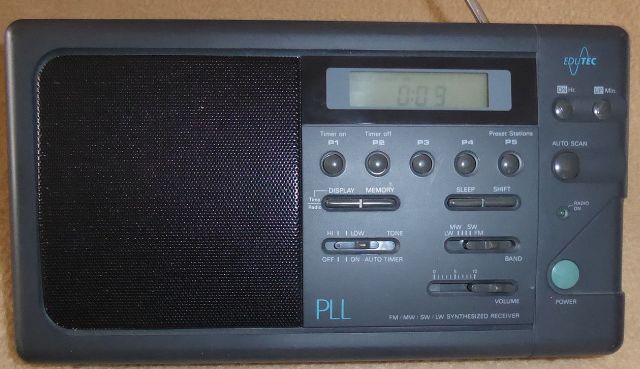
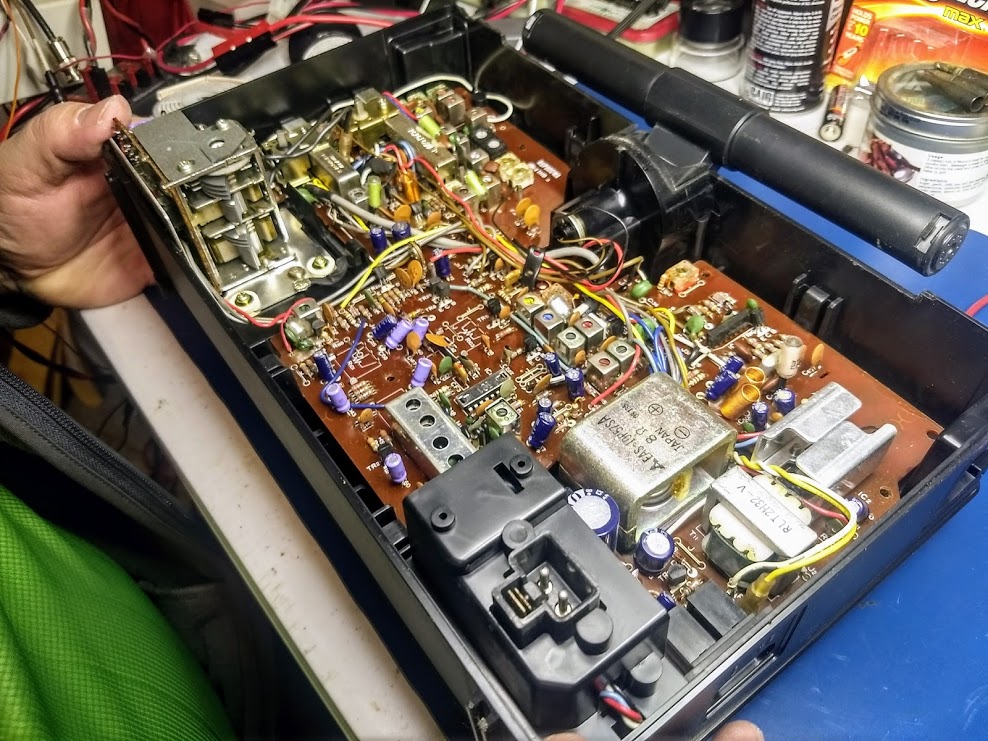
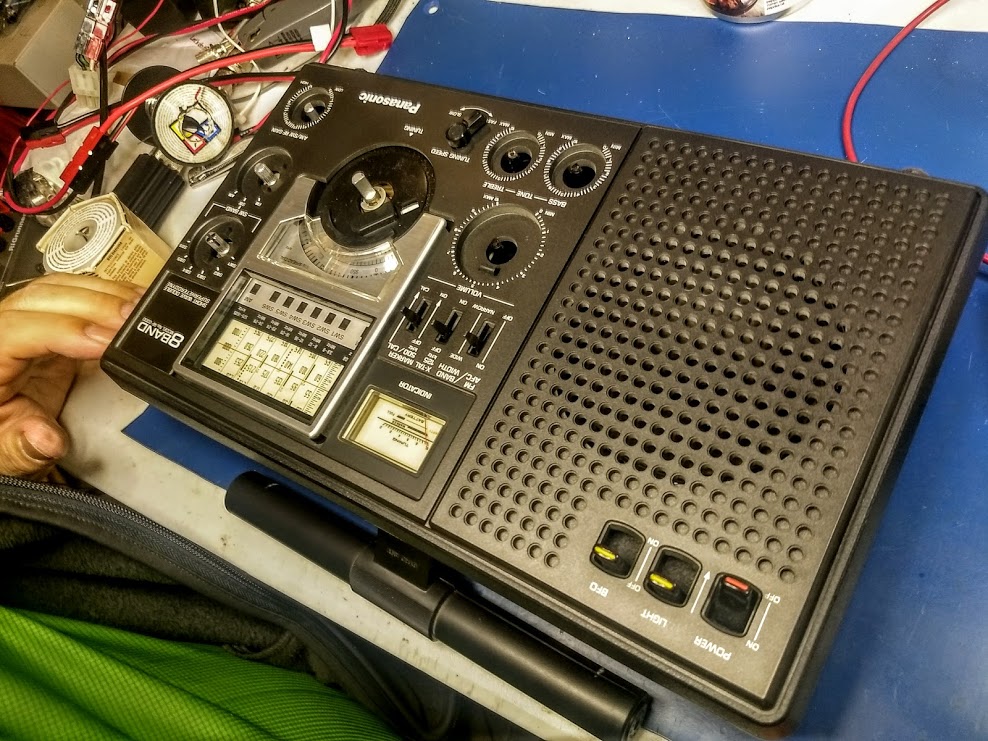
I would like to ask you if you can help me with a schematic diagram for an EDUTEC 4-Band digital radio (PLL EDUTEC 4-Band Digital Radio Weltempfänger). It is not broken, but I would like to modify it. Of course, I could spend some time and manually extract the schematic, but I would lose too much time.
While I know that “EDUTEC” is a registred trade mark for technical (“non-food”) products that was sold by “Eduscho Handelsgesellschaft” in Bremen and also I found that it is now owned by Tchibo, well – I would like to kindly ask you for help in this matter? (course, if you can).
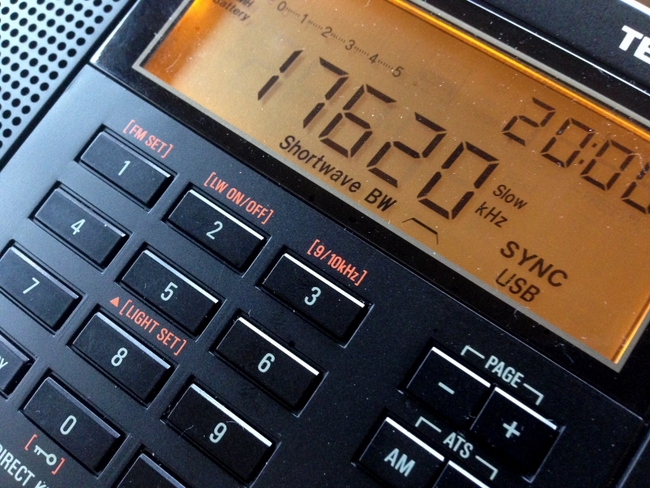
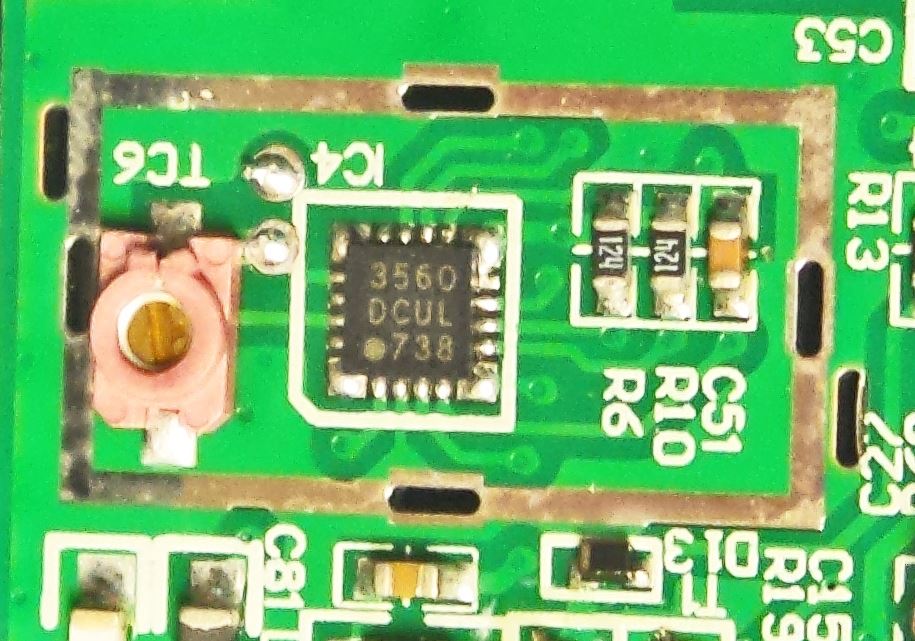
It is an old product, probably made in the 90’s and until now, I didn’t find anything on the net about it. I opened it and I found that its core is TA8132AN, and the FM section is made around TA7358AP. The audio stage is built with C1212C, and there is one more integrated circuit there, TA8148S (no datasheet on the net, but I found that is a DC-DC converter for electric tuning – built-in stabilized supply output for biasing VHF tuner variable capacitor / sine wave oscillation).
BTW, I found it also in SONY CFS-W504L
The PLL chip is soldered with the unmarked side, so I don’t know what type it is.
[See photo at top of post.]
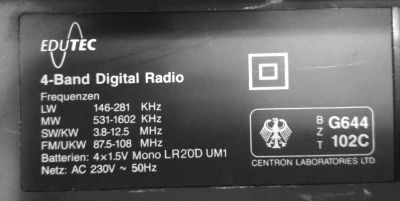
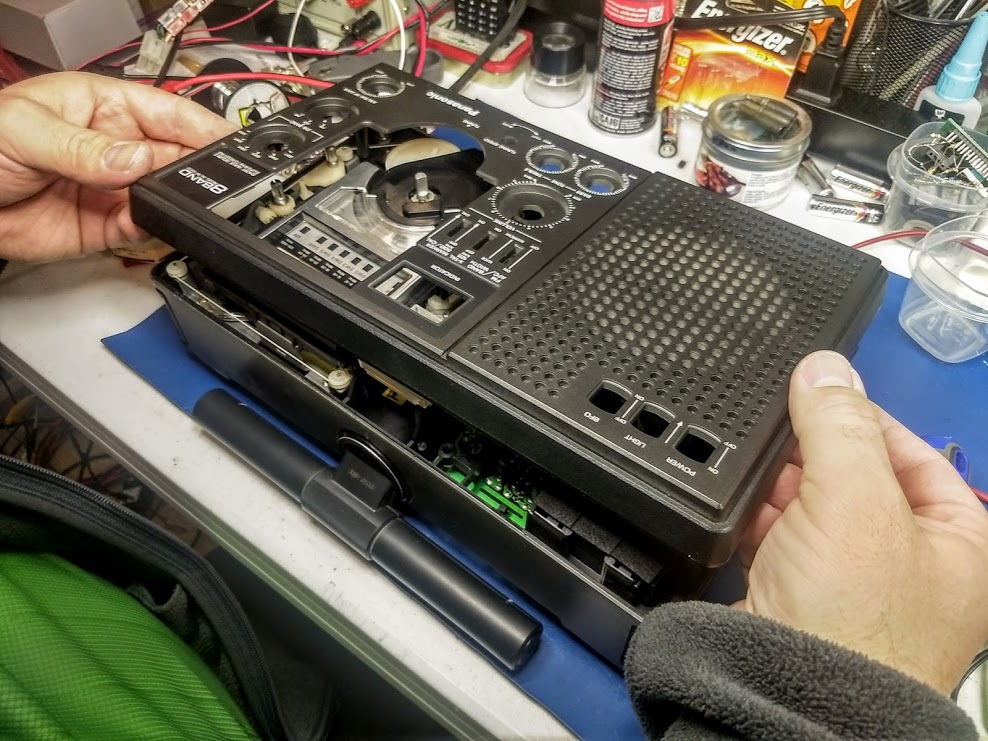
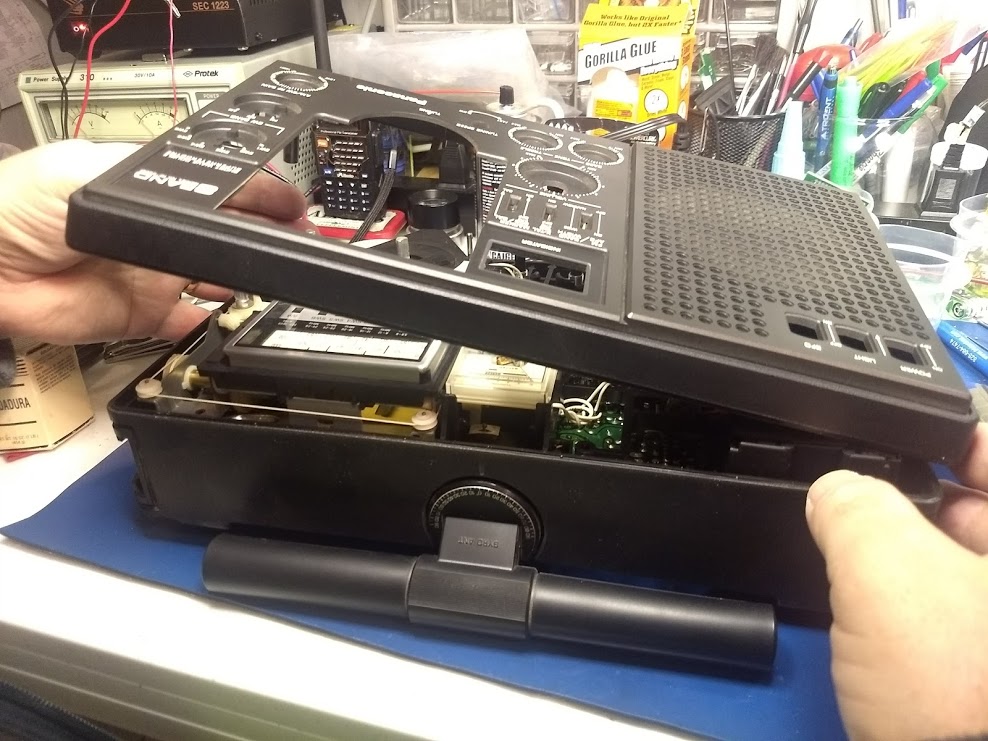
Here is a photo of the rear back stand:
Unfortunately, there is no other model or name written on the radio.
I see there “CENTRON LABORATORIES LTD”, that points to the company with the same name from Gujarat, India. Very interesting :))
In the hope of an answer from you, please allow me to thank you and to congratulate you for the very nice site that you maintain there!
Many thanks, Cezar! It’s readers like you who make this site such a great one!
Post Readers: I hope someone may be able to help Cezar. This radio looks familiar–perhaps I’ve seen it badged with a different company name? Please comment if you can help Cezar locate a schematic.
[…]The drift on AM was terrible! After 10 minutes, it is jumping all over the place – if you touch the radio, the sound mutes and the display goes nuts. I pack it up to take it back but then I decide to google the problem and find this:
I do exactly what he says – I pull off the cover after unscrewing all of the screws (including the 2 in the battery compartment).
Only the speaker is attached to the front. I remove the three screws from the display and then tighten the two screws on the tuning wheels. They were barely loose – almost not noticeable – so I was not too optimistic. I carefully got it all back together (the plastic pieces that hold the fabric handle on only go back on one certain way and were sort of a pain!). I cross my fingers, plug it in, and wow – a brand new radio. The tuning is perfect. Zero drift on FM and AM. AM sounds excellent.[…]
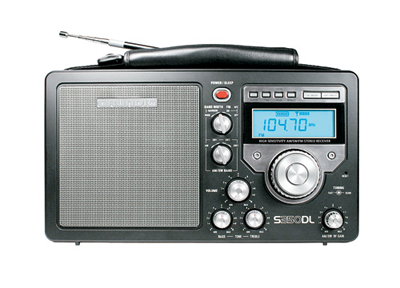
I have an earlier Grundig S350 that I bought at a hamfest years ago which had an easily-fixed power problem. For $20 it makes a nice bathroom radio and it sounds great, especially on FM.
BTW, I found schematics for it on radiomuseum.org, which is a great resource for radio schematics.
Thanks for the tip, Ed! I think I’ll crack open my S350DL later today and give this a try!
Many thanks to SWLing Post contributor, Rolf Snijder, who writes:
I have made the same modification to the Tecsun PL-680, that was done [by many on the] PL-660 earlier.
The PL-680 is now a great radio; I think now one of the best! I do not own a PL-660, so I cannot compare.
Photo detail
Overview of modification.
For disable soft mute you can see the 2 joints and you must scratch a path on the print near the switch. (same on a PL-660)
Closeup of joint #1 (click to enlarge)
Closeup of joint #2 (click to enlarge)
With the tone switch [on the left side panel of radio] you can turn the muting on and off. On FM I need to set it on for better results, but on LW MW and SW always off!
Frequency adjust is with the pot: adj1391 in the right corner. (for the 1 kHz off freq)
Click to enlarge.
Hope I can help someone with this on your great site.
Greetings,
Rolf Snijder
Netherlands
Many thanks for sharing this PL-680 mod, Rolf! This seems like a simple enough project and one that can be undone if you aren’t pleased with the results.
Post readers: Please comment if you’ve made this modification to your PL-680 or PL-660 or if you have other successful modifications to share!
Many thanks to SWLing Post contributor, Troy Riedel, who shares the following tip. Troy writes:
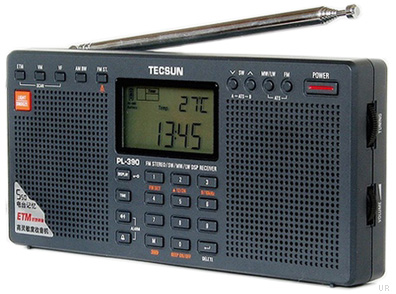
While surfing the Net I found the following procedure that is said to “disable soft muting in Tecsun 300-series radios”.
I have a PL-390 and this has indeed seemed to work on it but I didn’t notice a difference with my PL-365.
Since I just found & tried this, I don’t know if this procedure must be repeated each time you use the radio? Maybe [Post readers] have heard of this before and/or have experience with it?
Here is the “reported” [supposed?] procedure that worked for the PL-390:
To disabling “Soft Mute” on Tecsun 300-series radios:
1. Select a shortwave frequency, preferably where there is no stations transmitting.
2. Tune down the frequency range with the dial, don’t tune up or it won’t work
3. Press the VF Scan button to let it automatically tune down
4. Tune down with the dial to stop the automatic scan. If the background noise is higher, then the “soft mute” / “dynamic squelch” has been disabled.
Thank you, Troy! I was unaware of this modification, but it seems easy enough to implement.
Post readers: Anyone have experience using this mod across the Tecsun 300-series receivers? Please comment!
Many thanks to SWLing Post contributor, Rolf Snijder, who writes:
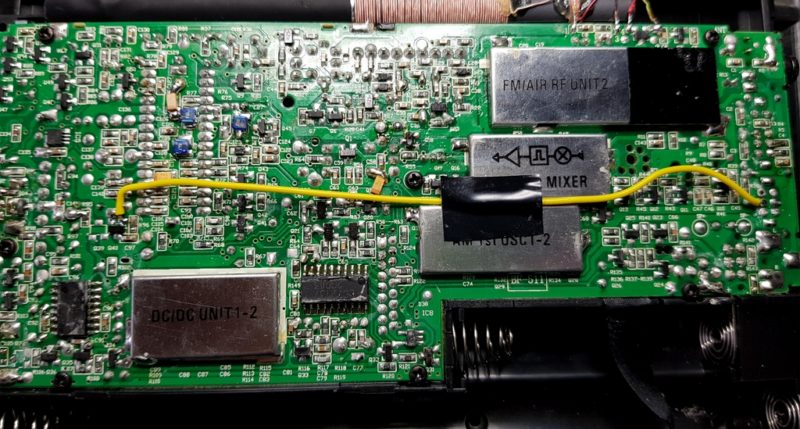
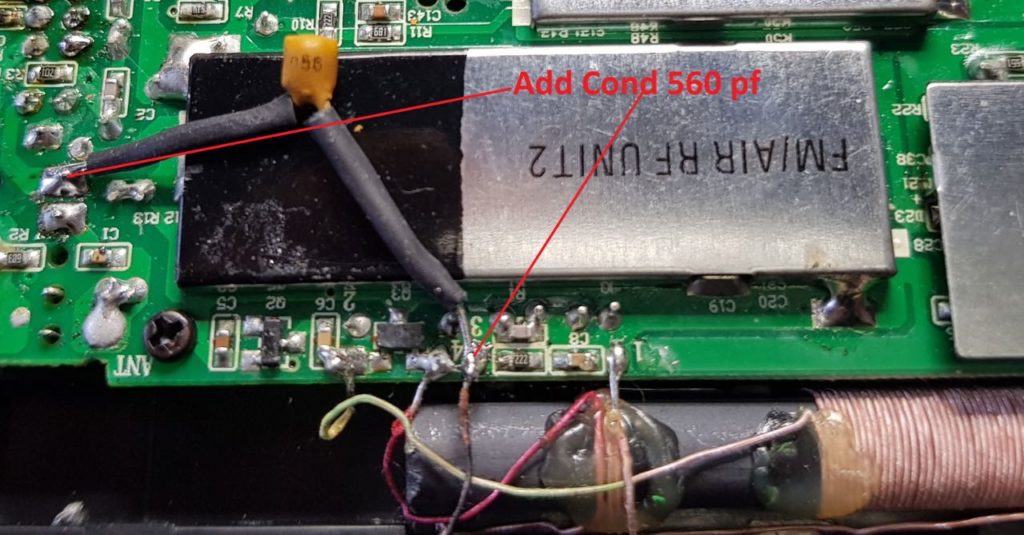
I did a modification today on the Tecsun PL-680 [which allows for an] external antenna on LW and MW.
The internal ferriet is also working, but on my active loop, MW and LW is now working !
So far away stations I can now receive on this portable radio.
It is only a560 pF capacitor added!
Click to enlarge.
Click to enlarge.
It works on LW and MW now with this mod.
FM is less now I think, maybe I will put it on a switch so I can turn it off.
And now also the ferrite is still working, so I hope to find a solution for that.
Many thanks for sharing your modification and photos, Rolf! Check out Rolf’s other PL-680 mod by clicking here.
Many thanks to SWLing Post contributor, Guillermo, who writes:
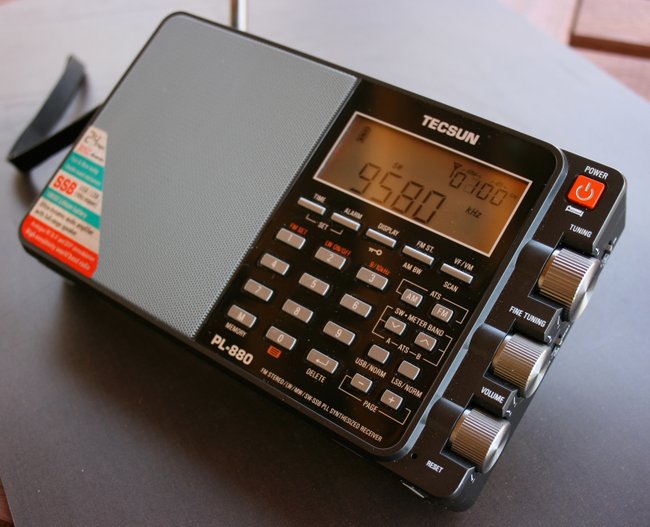
I own the PL-880 and just discovered a new feature : a 1.0 kHz bandwidth mode on shortwave (SW only not in MW).
The procedure to get it is as follows:
Tune to any frequency on shortwave and connectan external antenna (indoor or outdoor) via the miniplug port, then turn off the radio.
Disconnect the external antenna from the miniplug
Then turn on the radio and check when you push AM BW the 1khz showing on the display and then reconnect the external antenna. Now you can enjoy the 1.0 kHz bandwidth on shortwave!
Note: This procedure has to be done every time you move frequency, disconnect the external antenna, or turn off the radio once the 1.0 kHz bandwidth has been activated. To get this feature permanently (once you ‘ve already enabled it) you must to disconnect the external antenna while the radio is ON. If the antenna is disconnected after turning off the radio the feature disappear and all (steps 1 and 2) have to be done again.
Well, I hope you understand this description–if not please let me know, and tell me if it works on your unit, or it is just works on mine.
Thank you, Guillermo! I see where this is somewhat of a fragile adjustment in that a number of actions could change the bandwidth back to a previous setting, but nonetheless is quite a fascinating hack/hidden feature! Thank you and I’ll add this to our list of PL-880 hidden features.
Post readers: please comment if you can successfully enable the 1.0 kHz bandwidth on your unit. Please comment with your radio’s manufacture or purchase date if possible.
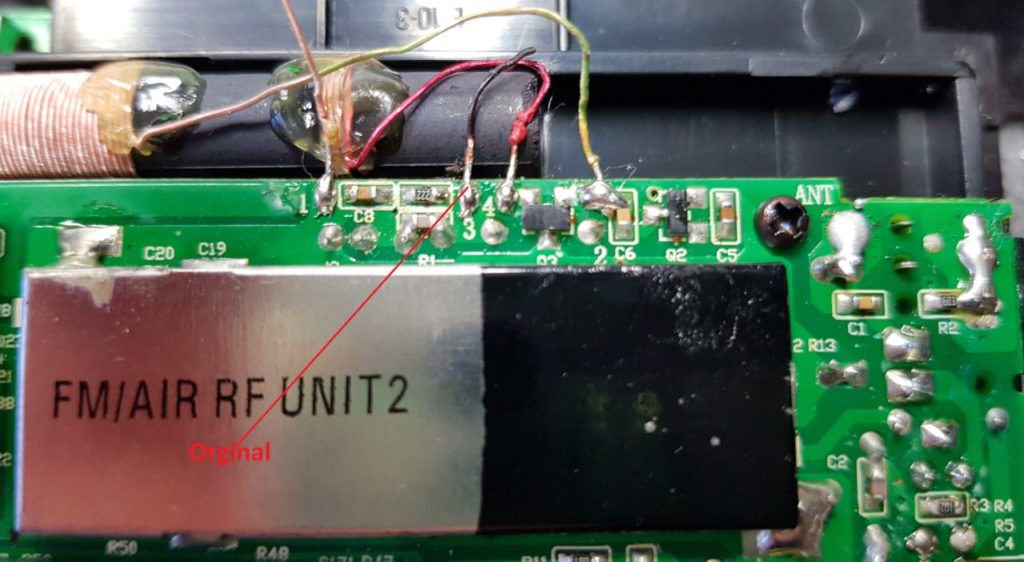
Many thanks to SWLing Post contributor, Rolf Snijder, who writes:
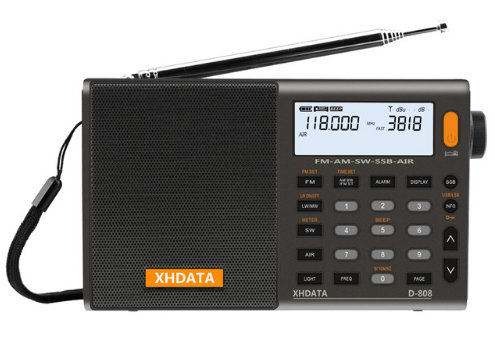
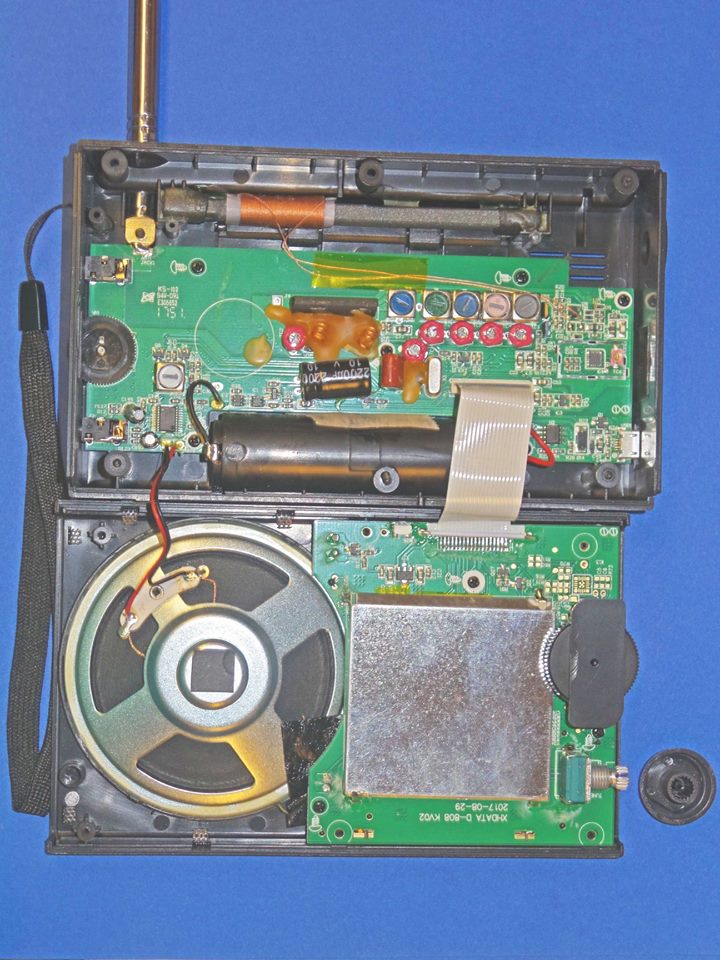
I have added an external antenna capability for mediumwave on the XHData D-808.
Simply add a 27 pF capacitor on the backside of the PCB on C10 to the the ferrite antenna.
The mod causes no loss on FM or shortwave!
I also replaced the Ferrite antenna with a bigger one so I now have more performance on MW!
Longwave is not good in my radio, even with an external antenna, it is not performing well.
Thanks once again, Rolf! I must assume that the Digitech AR-1780 could be modified in the same way as the radios appear to be near identical. Perhaps someone can verify this at some point!
Clearing the southern coastline of Maui en route to the Big Island. (Photo by Gary DeBock)
Many thanks to SWLing Post contributor and intrepid Ultralight DXer, Gary DeBock, who shares this DXpedition summary with recordings:
Kona, Hawaii DXpedition– Pacific Island Results
by Gary DeBock
From December 17-20 a Mini-DXpedition was conducted in Kona, Hawaii with a 5 inch (13cm) “Frequent Flyer” FSL antenna and a 7.5 inch (19cm) loopstick C.Crane Skywave Ultralight radio.
The FSL antenna was a new type designed to easily pass through TSA security checkpoints at airports, and provide inductive coupling gain roughly similar to that of a 4 foot air core box loop. South Pacific island reception was generally good from 0630-0800 UTC daily, but usually became problematic after that when powerful Asian stations tended to drown out the exotic Pacific island stations as sunset progressed over Japan, Korea and China. By 0900 daily only the most powerful Pacific island stations on 621, 846, 1098 and 1440 had much of a chance of surviving the Asian signal onslaught, and even some of those were drowned out. During a similar visit to Kona, Hawaii with identical gear in April (DXing at the same motel) the Pacific island stations were generally stronger, and had no co-channel competition from the Asians from 0800-1030 UTC. As such the South Pacific results during this trip were slightly down from April, although there were still plenty of strong signals to record.
The new 846-Kiribati on Christmas Island was a star performer as the strongest island DU station, with local-like signals shortly after the Hawaiian sunset each evening. Despite this it had an intermittent transmitter cutout issue, with the signal failing to transmit at odd intervals (including one stretch with six signal dropouts within one minute, as documented in an MP3 linked below). In addition 846-Christmas Island’s programming had a variable time delay with that of distant 1440-Kiribati in Tarawa, with both a 19-second and 35 second time delay noted. This may be related to the transmitter cutout issue, with the time delay changing after a major dropout. DXers looking for a parallel with 1440 should keep this programming quirk in mind. Although both 846 and 1440-Kiribati signed off at the usual 0936 UTC time on the first couple days of the trip, they had both switched to a 1009 UTC sign off on the last couple of days. Whether this is a permanent programming change is unknown, but the loud 1000 Hz audio tone is still being broadcast before power is cut, resulting in a very easy way to distinguish the stations at sign off time (even in heavy domestic QRM).
846 and 1440 weren’t the only exotic DU’s with transmitter issues. 621-Tuvalu came down with distorted audio on December 18th, a problem which got worse and worse on the remaining two days. By the last day it was sounding very garbled, making a bizarre combination with 621-Voice of Korea’s buzzing Japanese service transmitter. Whether 621-Tuvalu has repaired its garbled audio is also unknown.
540-2AP was somewhat weaker than it was in April, while 558-Radio Fiji One was MIA during the entire trip (probably because of Asian QRM). Efforts were made to track down 630-Cook Islands but only a weak UnID was recorded. 801-Guam was possibly received during a Pyongyang BS/ Jammer fade, but 990-Fiji Gold was given a golden knockout by 990-Honolulu. 1017-Tonga showed up for a couple of good recordings, but got slammed by Asian co-channels after 0830. Efforts to track down 1035-Solomons ran into heavy 1040-Honolulu splatter, while 1098-Marshalls became the only Pacific island station to have stronger signals than in April. Its overwhelming signals after 0700 daily were one of the bright spots in Pacific island reception. Finally the new 1611-DWNX in Mindanao, Philippines was received at a strong level at 0855 on December 19th, apparently with a major boost from sunset skip propagation.
540 2AP Apia, Samoa, 5 kW Christian worship music at a good level through the T-storms at 0751 on 12-17, but not nearly as strong as in April:
621 R. Tuvalu Funafuti, Tuvalu, 5 kW This station had very strong signals until around 0800 on most evenings, when it usually began to be pestered by Asian QRM (China, N. Korea and NHK1). It also came down with a garbled audio issue on December 18th, which continued to get progressively worse until I left Hawaii. Sign off time is still around 1006, but by that time it ran the gauntlet of powerful Asian co-channels during the December propagation.
Local employment offers read by the usual lady announcer at an S9 level at 0750 on 12-18. This was the last undistorted audio signal recorded from the station during this trip; after this the audio went “south”:
Full Radio Tuvalu sign off routine at 1003 on 12-18, but with China QRM initially. Tuvalu’s signal prevails during the national anthem, but the audio distortion is quite noticeable. The carrier apparently stays on for over a minute after the audio stops:
630 UnID While trying for the Cook islands (Rarotonga) I came across this weak Christmas music with English speech at 0742 on 12-17, although this could just as easily be a west coast domestic station playing the “exotic” to fool a hopeful DXer. Walt says this station is a notorious underperformer:
846 R. Kiribati Christmas Island, 10 kW This newly rejuvenated station had awesome signals, and was overall the strongest Pacific island station received. Of all the Pacific island DU’s it faded in at the earliest time after sunset, and maintained its strength even during strong Asian propagation — as long as it managed to transmit without its signal dropping out. Unfortunately this seemed to be a pretty common occurrence while I was in Kona. Island-type music at typical S9 strength at 0735 on 12-18:
After a prolonged 846 transmitter dropout it seemed like the programming time delay between the distant 1440-Kiribati on Tarawa Island and the new 846-Kiribati on Christmas Island would change. On December 17th I recorded two different time delays– 19 seconds, as in the following recording (the MP3 starts out on 846 at 0635, switches to 1440 at the 1:02 point, then switches back to 846 at the 1:34 point, with a 19-second time delay evident between the 1440 and 846 programming (846 lags behind):
Later on the same evening there was a 36 second time delay between 1440 and 846, with this MP3 starting off on 1440 at 0645, and switching to 846 at the 11 second point:
1098 R. Marshalls (V7AB) Majuro, Marshall Islands, 25 kW This station was very strong in Kona with its island music every night, and rarely had any Asian co-channels.
S9 Island music and native language speech (and possible ID) across the 0700 TOH on 12-17:
1440 R. Kiribati Bairiki, Tarawa, 10 KW Somewhat weaker than its rejuvenated 846-Christmas Island parallel (which has variable programming delay times, as explained above), this home transmitter could hold down the frequency until around 0800 every night, after which it was usually hammered by JOWF in Sapporo. Despite this it often put up a good fight until its new sign off time of 1009, and it continues to use the loud 1000 Hz tone right before the power is cut (an awesome aid for DXers hoping to ID the station through heavy QRM).
Typical island language speech and strength level at 0830 on 12-18, just as it is starting to get jumbled by JOWF (a Japanese female “Sapporo desu” ID is at 25 seconds):
Full sign off routine at 1005 on 12-19, including the National Anthem and the 1000 Hz tone before the power is cut. The tone gets through the JOWF QRM like a DXer’s dream:
1611 DWNX Naga City, Mindanao, Philippines, 10 kW (Thanks to Hiroyuki Okamura, Satoshi Miyauchi and Mauno Ritola for ID help) Received at 0855 on 12-19, this station was a mystery until the Japanese friends matched the advertising format with that of a new, unlisted station which just came on the air in the Philippines. The propagation apparently got a major boost during sunset at the transmitter:
73 and Good DX,
Gary DeBock (DXing at the Royal Kona Motel with a 7.5″ loopstick C.Crane Skywave Ultralight+
5 inch (127mm) “Frequent Flyer” FSL antenna.
Thank you for sharing your Hawaiian DXpedition with us, Gary! Your mediumwave DX catches with modest equipment reminds us all that when HF propagation is poor, there is still so much signal hunting below 2 MHz!
Many thanks to SWLing Post contributor, Rolf Snijder, who shares the following modification for the Sony ICF-SW35. The mod is very simple: remove one capacitor.
Rolf shows the capacitor location on the following images:
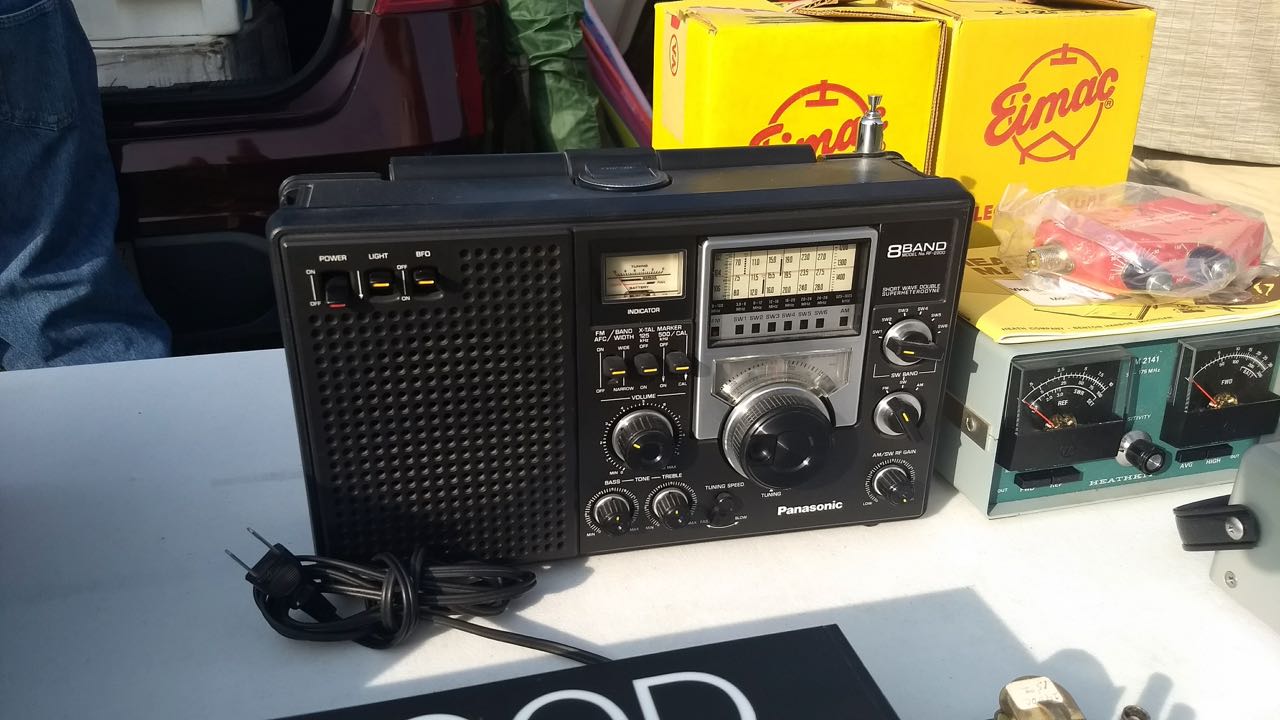
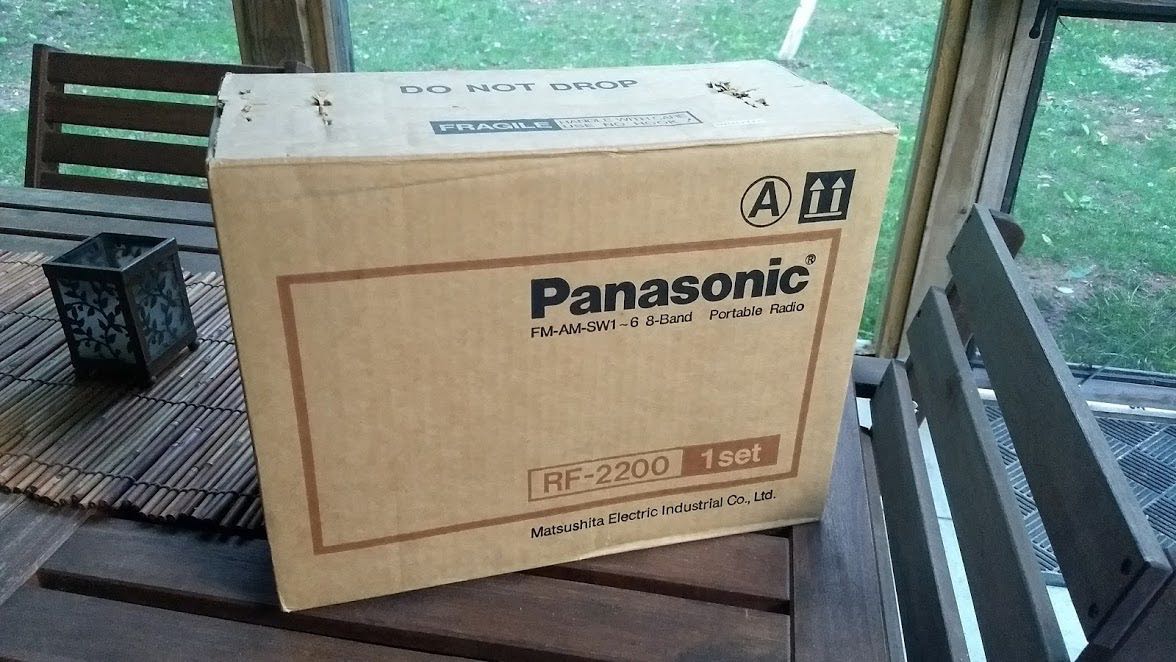
Last year, at Hamvention, I picked up a Panasonic RF-2200 for $70. It came with the original box, manual and was in superb cosmetic condition.
The seller told me that over the years he exclusively used the radio to listen to a local FM station.
At that price, I didn’t hesitate to make the purchase even if this would have simply been a non-functioning parts radio for my other RF-2200.
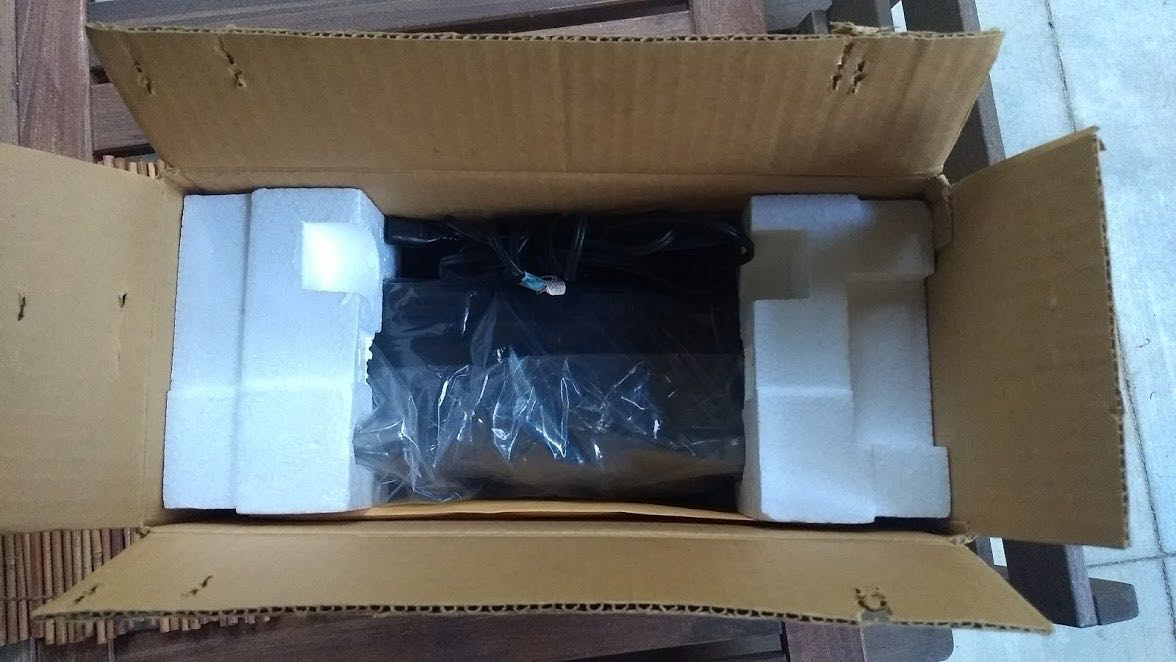
After I brought the radio home, I unpacked it and gave it a quick test.
FM worked brilliantly. Mediumwave and shortwave, however, were essentially deaf. I made the assumption that the ‘2200’s switches and pots likely needed cleaning with DeoxIT. The next day, I was leaving for a two month trip to Canada though, so I packed the RF-2200 back into its box and set it to the side of my shack table.
Fast-forward to yesterday…
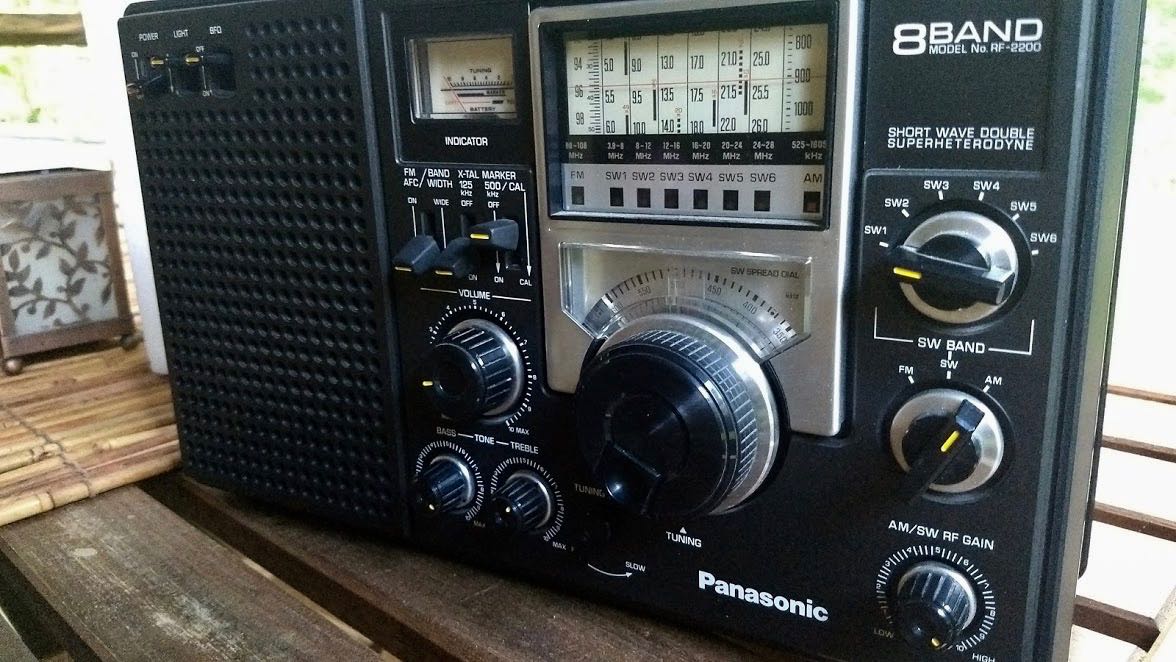
While digging around my shack, I re-discovered the boxed RF-2200. Since I was planning to visit my buddy Vlado (the best radio repair guy in the world) yesterday evening, I thought I’d take the RF-2200 and do a proper contact cleaning. Several of the RF-2200’s switches and pots cannot be easily cleaned without removing the chassis.
(Click photos to enlarge.)
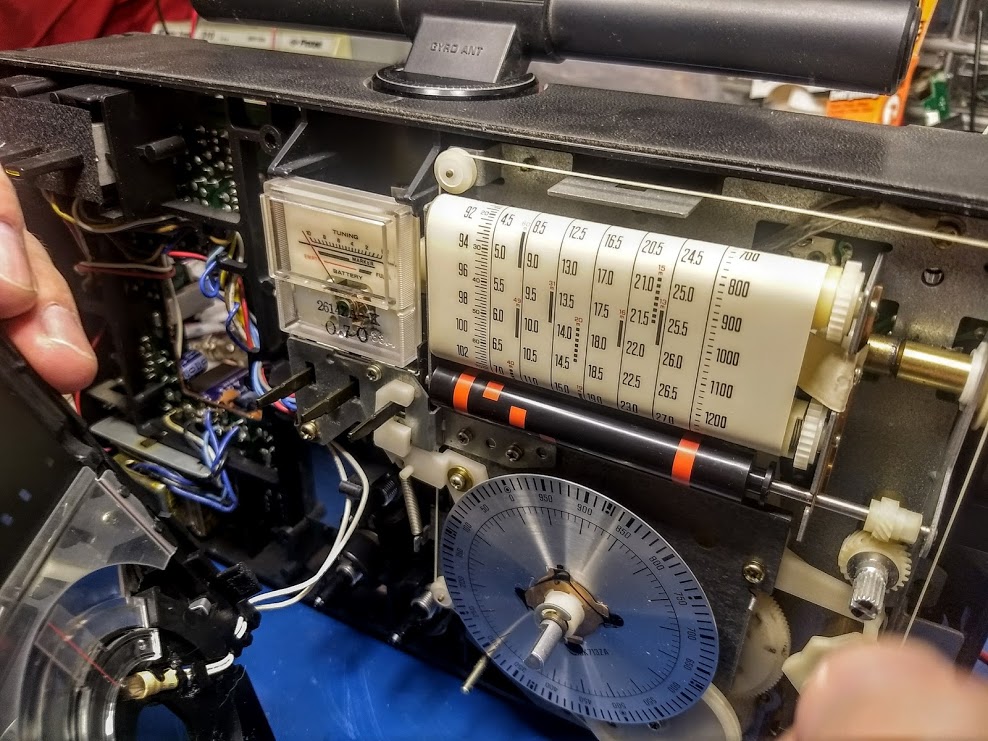
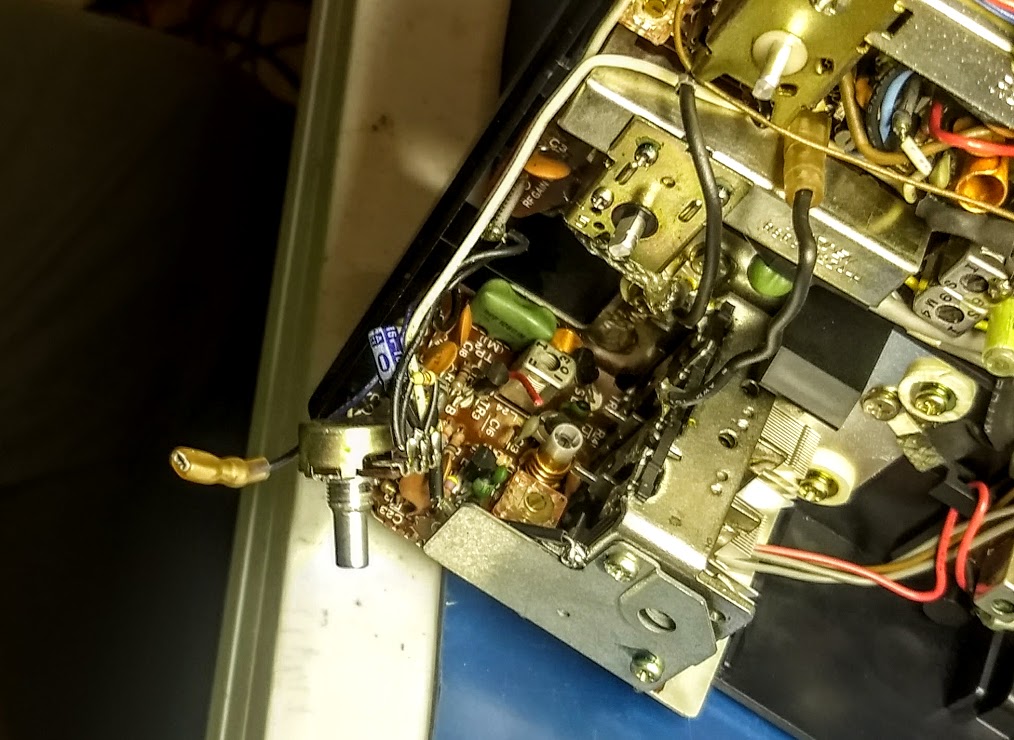
Vlado is familiar with the RF-2200 and since it’s not the easiest radio to work on, I asked for his expert hands on the job. Within seconds of handing him the radio, he plugged it in, tested the switches and pots, then removed the back cover (disconnecting the battery compartment leads) and then the front cover (disconnecting the speaker leads).
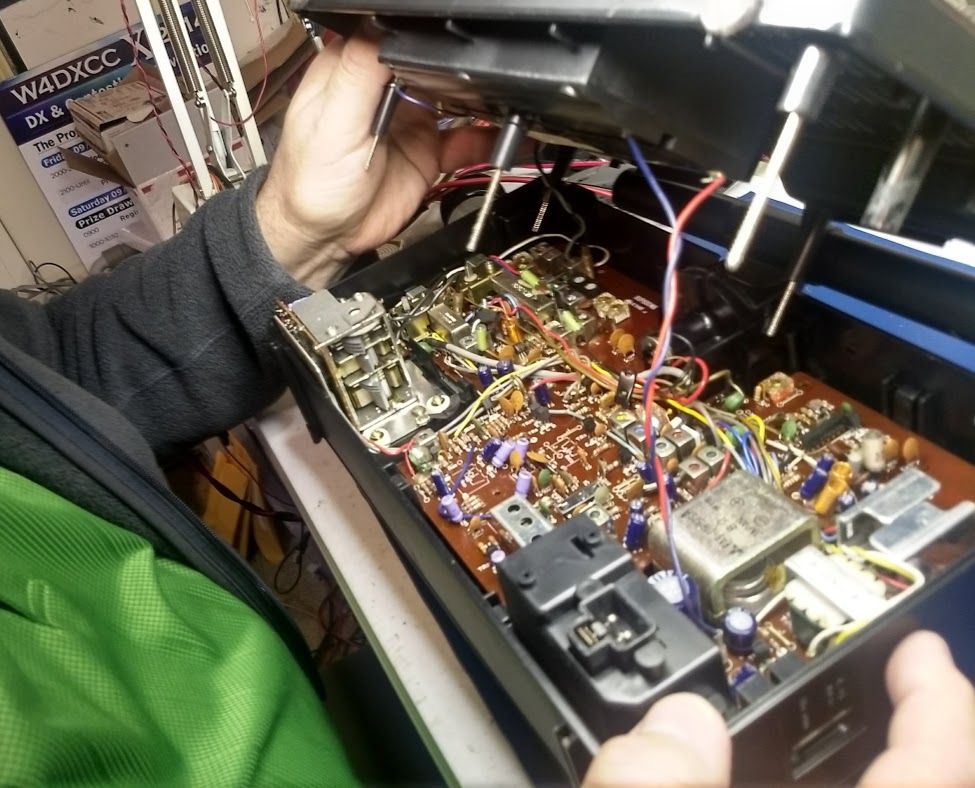
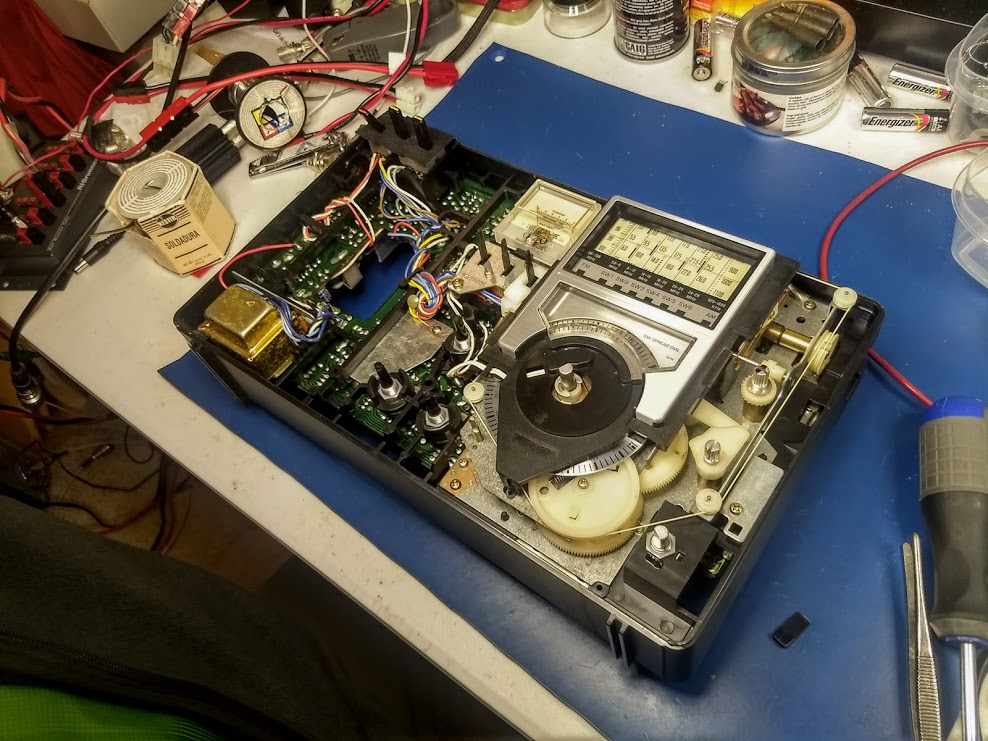
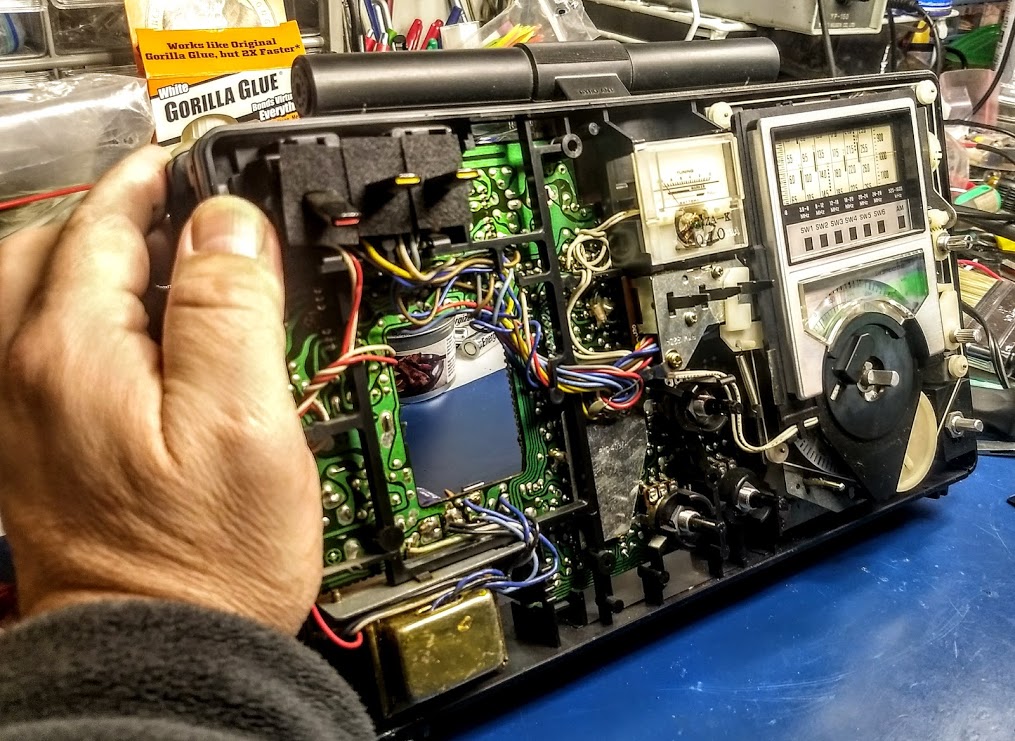
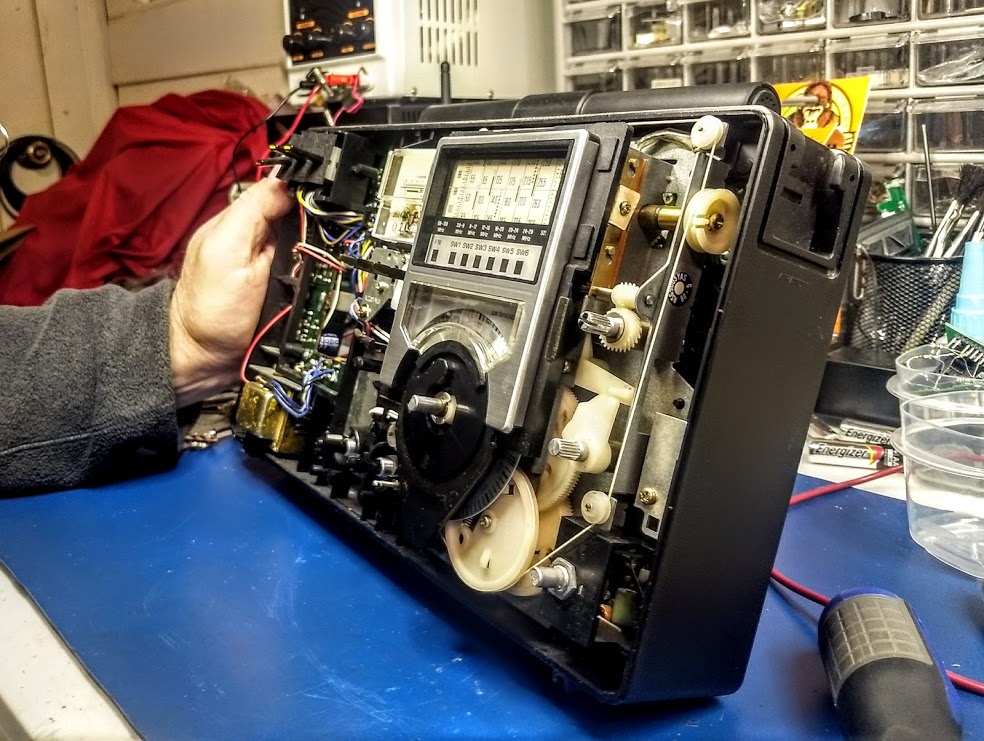
The magic behind the RF-2200’s classic analog dial: Vlado offered a word of caution to anyone operating on their RF-2200: as you can see in the photo below, the dial string snakes around the front of the radio and is very close to some key components. You must exercise caution when having a soldering iron tip near the string, or using lubricants nearby.I didn’t realize this, but by the time Vlado started taking apart the RF-2200, he had already determined that even though the contacts needed cleaning, this wasn’t the source of the audio problem for the MW and SW bands.Vlado expertly pulled out the pot for the FM/AM/SW selection–not an easy task–began cleaning it, testing it and re-soldering contacts.
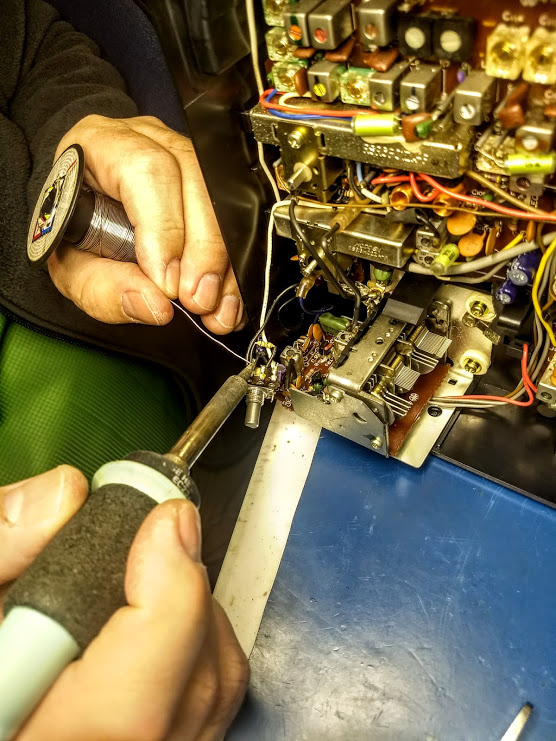
Vlado determined the pot was actually in good shape, thus started testing the rest of the circuit.
After a few minutes of performing tests and getting intermittent performance, he determined that at least one, if not more, of the RF-2200’s caps need to be replaced. Of course, neither one of us was terribly surprised. At this point though, it was getting late and I had an early wake up time in the morning, so I left my RF-2200 with Vlado.
Am I worried about this prognosis? No, not in the slightest…
Doctor Vlado is on the job!
Vlado will have the RF-2200 back on the air in no time, working as well as it did when it was new. He’s actually performed a similar RF-2200 repair for an SWLing Post reader and I’m willing to bet this repair job is relatively simple compared to most he encounters (including the Icom IC-7200 he recently repaired after it was hit by lightening!).
I’ll try to post a “Part 2” update with photos of the RF-2200 repair. Follow the tag: Panasonic RF-2200 Repair
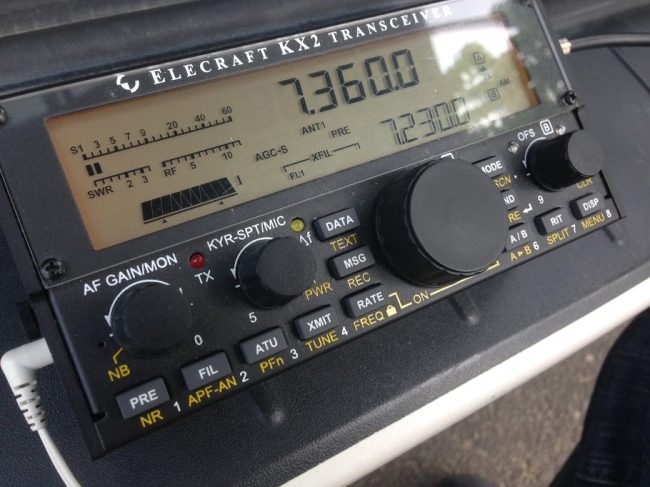
Many of you know I’m quite a fan of the Elecraft KX2. I take this little transceiver along almost any time I travel. Not only is it a full-featured ham radio transceiver, but it’s also an exceptional shortwave broadcast receiver.
The KX2 is a quality US-built rig (like all of Elecraft’s gear) but I’ve never been a fan of its plastic encoder knob. It lacks a finger dimple and feels cheap compared to the rest of the radio. Don’t get me wrong: the stock encoder knob gets the job done, but it’s not nearly as nice as the one on the slightly larger Elecraft KX3.
Comparing the Elecraft KX3 (top) and KX2 (bottom) at Elecraft’s Dayton Hamvention booth.
The price was $24.95 US shipped. I didn’t hesitate to place an order.
You might think $24.95 is a lot to pay for such a small item, but third party Elecraft vendors tend to charge much more for comparable items. I’ve also considered adding a heatsink to my KX3, for example, but those can total upwards of $100!
My new encoder knob arrived in only a couple of days via the USPS–installing it was a breeze.
It took me all of thirty seconds to pull the plastic knob off of the KX2 and replace it with the new aluminium one. The seller even includes an Allen wrench to secure the new knob.
The new knob is slightly larger in outer diameter, but fits the KX2 like a glove. The slightly larger size makes the finger dimple a practical addition for smooth band-scanning.
If you own an Elecraft KX2 (or the Elecraft KX1) I highly recommend this simple encoder/VFO knob upgrade!
Many thanks to SWLing Post contributor, Mike Mander, who writes:
I’ve recently really been enjoying swling.com. Thanks for having such a great resource online with shortwave radio and hardware reviews, tips and more! I started listening to shortwave on an old Philips portable receiver back in the late 70’s as a teenager. Recently, after decades of not listening to shortwave, I decided to buy an Eton ‘Grundig Edition’ Satellit radio and in no time at all, I had also acquired a C.Crane Skywave SSB and now, within the last week, a Tecsun PL-660.
[…]I thought I’d record a video showing how one can calibrate AM, FM, SW wide-bandwidth as well as SW narrow-bandwidth independently, and how to reset those calibrations back to factory default. I have not heard it mentioned anywhere that one can calibrate both wide and narrow bandwidth SW modes independently.
Online, I have read about many people being disappointed in their PL-660’s wide-bandwidth frequency calibration, where often being on-station results in the frequency being up to 5 kHz too low, and it seems many simply return their radios as defective, not realizing how easy it is to recalibrate. This is the first “instructional” video of this sort that I’ve ever posted online, so you’ll have to pardon if I am perhaps not explaining things clearly enough:
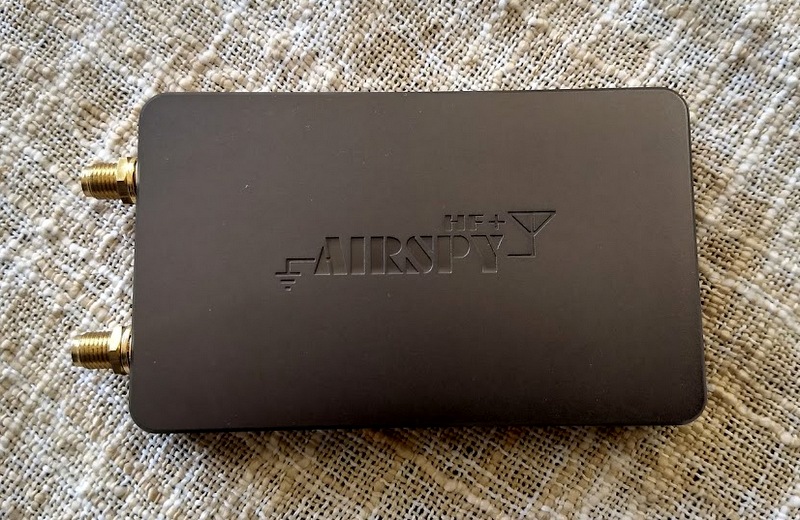
After SWling Post contributor, Guy Atkins, posted the survey results of his excellent Elad FDM-S2 vs AirSpy HF+ weak signal comparison, I received a few questions about the AirSpy HF+ “R3 Bypass” modification Guy mentioned in his post.
Guy has not yet performed the modification on his HF+–neither have I–but he points out that others have noted it: “significantly boosts sensitivity of the HF+ from longwave up to about 15 MHz, without any noted overload issues.”
I reached out to AirSpy president, Youssef Touil, for a little more insight about this modification. Youssef replied:
During the early phases of the design R3 was a place holder for a 0 ohms resistor that allows experimenters to customize the input impedance. For example:
A 300 pF capacitor will naturally filter the LW/MW bands for better performance in the HAM bands
A 10µH inductor would allow the use of electrically short antennas (E-Field probes) for MW and LW
A short (or high value capacitor) would get you the nominal 50 ohms impedance over the entire band, but then it’s the responsibility of the user to make sure his antenna has the right gain at the right band
A custom filter can also be inserted between the SMA and the tuner block if so desired.
Click to enlarge. (Photo source: RTL-S1DR.com)
R3 and the nearby resistors have been intentionally left outside of the RF shield, and their size was picked to be big enough to allow anyone to play with them. You will notice the size difference with the rest of the components.
In general, unless one knows what he’s doing, it’s not recommended to alter a working system. “If it’s working, don’t fix it”. But, we are hobbyists, and not doing so leaves an uncomfortable feeling of something unachieved. Most brands addressing the hobby market leave some tweaks and even label them in the PCB.
The main purpose of the HF+ is the best possible performance on HF at an affordable price. This is to incite HAMs to get started with this wonderful technology while using an SDR that isn’t worse than their existing analog rig.
The MW/LW/VLF crowd may have slightly different requirements, but that can be addressed by shorting a resistor.
Regards,
Youssef Touil
Thank you, Youssef, for replying to my inquiry so quickly and thoroughly.
No doubt, I too will eventually modify R3–it’s very difficult not to experiment, especially when a product was designed with the experimenter in mind.
I really feel like AirSpy has knocked it out of the ballpark with the HF+. For those of us primarily concerned with HF performance, this SDR is very hard to beat–especially at its $199 price point!
The XHDATA D-808 portable is an AM-LW-FM-SW-SSB-AIR band model which has already been the subject of many excellent reviews. Until recently the model was not marketed to North American purchasers, but recently a couple of Chinese sellers have started soliciting North American buyers via eBay listings.
My own interest in the model was in comparing its AM Band performance to that of the best performing Ultralight radios– specifically the CC Skywave and Skywave SSB models. Although the D-808 is slightly larger than the 20 cubic inch limit for Ultralight radios, its size and weight make it very convenient to take along as a “travel portable,” specifically as an SSB-enhanced model capable of checking transoceanic station carrier strength on exotic ocean beaches. The Skywave SSB model can also do that– but at a $169.99 list price, compared to the $112.86 (plus $10 shipping) cost of the D-808. In addition, none of the published D-808 reviews seemed to have any information about internal components like the loopstick, or Si4735 DSP chip.
My first test was to compare the stock Skywave SSB model with the D-808 in fringe AM station reception. The Skywave SSB model has a reputation of being one of the most sensitive Ultralight radios, but the D-808 clearly outperformed it on both low band fringe station (550-KARI) and high band fringe station (1700-City of Auburn TIS) reception. The D-808 couldn’t quite hang with a 7.5″ loopstick Skywave model, but that only made me curious about how the same modification could enhance the D-808. So… it was time to disassemble the D-808, and find out why its loopstick was such a superior performer.
The D-808’s 3 7/8″ (98mm) loopstick is shown adjacent to the 2 3/4″ (70mm) loopstick of the CC Skywave models. The D-808 is much easier to disassemble than the CC Skywave models, though, so enhanced loopstick transplants should prove to be quite popular in the D-808.
The D-808 loopstick is 3.7/8″ (98mm) long, while that of the CC Skywave SSB model is only 2 3/4″ (70mm) long. Other reviewers have noted the excellent performance of the D-808 on the AM band, and this is probably one of the main reasons. The SSB mode operates very similar to that of the Skywave SSB in providing a quick check of carrier strength on weak AM band targets– the LSB mode can be set to +55, and the radio tuned to different frequencies to check fringe station carrier strength. This can provide a real-time check of propagation changes during time-limited propagation openings for live ocean beach DXing with Ultralight radios or other portables (or with the D-808 itself, if desired).
The D-808’s Si4735 DSP chip was initially used in the Eton Traveler III Ultralight radio model, which was fully reviewed in the 2015 Ultralight Radio Shootout (where it won top honors for MW sensitivity). The D-808 augments that capability with a significantly longer loopstick, plus multiple DSP filtering selections. As such, the D-808 in stock form should be a very superb performer.
The Si4735 DSP chip has markings of “3560, DCUL, .738” and provides a wide range of AM bandwidth choices for the Medium Wave DXer (6K, 4K, 3K, 2.5K, 2K, 1.8K and 1K). These perform very well, and as with the other DSP-enhanced portables, the narrowest bandwidth (1K) provides the most sensitive AM band reception.
In construction very similar to that of the CC Skywave, the D-808 separates into two main circuit boards, connected together by a plug-in ribbon cable. One strange quirk is that the Si4735 DSP chip is located on the RF board (close to the center right edge). The Si4735 DSP chip is also used in the Eton Traveler III Ultralight radio, and although that model lacks the multiple DSP filter selections of the D-808, is has been the subject of highly successful 7.5″ loopstick transplant modifications– proving that such enhanced Medium Wave and Longwave loopsticks will perform very well in the new, Si4735 chip- powered D-808.
Disassembly of the D-808 model is fairly straightforward in comparison to the CC Skywave models, and the technician doesn’t need to memorize a detailed reassembly protocol in order to perform a routine loopstick transplant operation. Neither C.Crane nor XHDATA are likely to show any sympathy to someone botching up an antenna transplant, so you need to be confident that that your skills are superior to those of the company technicians before taking the plunge. In the CC Skywave and CC Skywave SSB models various parts fit together like a puzzle, but the D-808 isn’t like that. It should prove to be a fairly popular model for enhanced MW and LW loopsticks.
Those considering a purchase of the D-808 should be advised that its type 18650 Li-ion 3.7v battery is not commonly available at most stores, and that Postal regulations supposedly forbid shipping these batteries through the mail. One of the eBay sellers (harelan ecommerce) did manage to ship me two of the standard XHDATA type 18650 batteries through the mail (along with two new D-808 models) but if your seller won’t do this, you can still purchase the batteries on eBay. Some of the 18650 batteries sold on eBay have a flat positive terminal which won’t contact the D-808 cabinet’s positive battery connector terminal, but in such a case you can simply insert a #8 lockwasher in between the two, and the arrangement will be very secure. From that point on you can simply recharge the battery with a USB terminal connector.
Thank you for sharing this technical overview of the XHDATA D-808, Gary! I’m looking forward to the antenna mods you’ll no doubt make to this compact DX machine!
Many thanks to SWLing Post contributor, Luke Perry, who writes:
Hi Thomas, I thought I would share with the people on the SWLing Post my new radio purchase.
I needed a receiver with a noise blanker as you might (or might not) recall my issue that I was having with electrical noise at my listening location. So I saw this on the local Craigslist for $50 and called right away and I was lucky to be the first one to respond.
The seller was the original owner and he had bought it back in the 80’s after coming back from Saudi Arabia so he could listen to the BBC. It was fully working but when I got home I noticed that tuning dial was not working and this set does not have direct frequency input for some reason.
I went online and scoured the internet for a possible fix and found a old posting that said to adjust the pots on the encoder board behind the main tuning knob. I found a service manual online and located the position of the board and thankfully that was the fix. But for some reason the position that they both were in was not the correct position so I don’t know if someone had been in there before but I doubt it.
Anyway, I am very happy with the purchase and the noise blanker seems to really work as I could not listen to any frequencies above 5 MHz on my old radio due to RFI. Also, the R-2000 seems to be very sensitive just from the small wire antenna that I have been using so I plan to get a better antenna and I am hoping to get some good DX catches.
Anyway, I thought I would share the news of my new purchase and hopefully the fix for the tuning knob might be of some use to others down the road.
I’m so glad you found the fix for the encoder function, Luke. Thank you for sharing because, no doubt, others will be searching for this solution. Sounds like it was a simple enough fix and certainly did the trick. If you ever need to re-cap the R-2000, you can find kits like this one to make the process easier. If you don’t want to do the work yourself, my friend Vlado recaps radios for a very reasonable price.
I’m sure you know you really snagged a deal grabbing that R-2000 for $50! Wow!
Many thanks to SWLing Post contributor, TomL, who shares the following guest post:
Stupid Radio Trick – DSP “Hi-Fi”
by TomL
If you can remember the 1960’s, there was an audiophile rage going on called Hi-Fi. The base unit consisted of a ponderous piece of furniture consisting of a rectangular cabinet and equally large mellow sounding speaker of fairly smooth frequency response, say in the range of around 40 – 15000 Hz. They would have a built-in radio (using vacuum tubes) with large analog scale. Most would also have a “record player” embedded on the top to spin some vinyl discs (78 or 33 rpm).
For pedestrian consumers, it became a decision of how to keep up with the Joneses, so-to-speak. And that meant a trip to Sears to look at the latest offerings. When the decision finally came to purchase, of course no one could buy it outright. So, to add to the suspense, one had to put money down on “Lay-A-Way” plan that did not allow you to take possession of your prized choice until the last monthly payment! One had to visit or mail in a check every month.
So where am I going with all this? Well, as you can see from the photo [above], I have purchased three portable radios for three very different purposes. All three were painstakingly studied and reviewed and weighed against all other possible choices. All are highly rated by the usual reviewers like RadioJayallen, SWLing Blog readers and other internet personalities. The Sangean is for home use and listening to baseball games when I did not want to fire up the stereo hooked up to the Grundig Satellit 800. The small Sony ICF-19 is a phenomenal knock around radio for the car and listening while out to lunch or a walk in the park. The large Tecsun S-8800 is a possible replacement for my ailing 20+ year old Sony ICF-2010 for shortwave use.
Well, I was tired of listening to any one of them in terms of sound quality. The Sangean has too much upper bass/lower mid range, the small Sony is very carefully maximized for total speech clarity, and the Tecsun seems to lack a little in the mid range frequencies (compared to highs and lows). Staring at them, I thought to self, “What if I turn on the Sangean and Sony together???” What ensued was a revelatory sonic experience (it sounded pretty good)! One seemed to fill in the other in certain ways. But it was not perfect.
Duh, I had the new Tecsun in a carry case while trying to decide if I send it back for a tuning quirk and dug it out and plopped it on top. Turning it on, I heard more lows and highs, just like a Field Radio should have but with the mid range filled in! After very careful volume adjustment, I now have something that could rightly be called DSP Hi-Fi. At least, that is what I am calling it for now. ?
Violin and piano pop-out of an orchestra but not too harsh sounding. Rock & Roll sounds loud and punchy without that boombox effect. Bass lows are there (could be better, now all I need is a small subwoofer connected to the Tecsun line-out ???). Highs are there too but well controlled. Mid range voice clarity is stunning, as if someone is in the room with me but not sounding too forward! It is not room-filling but acts more like a near-field monitor. I like that I can line-up the speakers over each other.
The really fortunate thing is that all three radios have complete DSP for FM and receive my favorite over-the-horizon station with very similar reception quality. Also, they process DSP with a similar delay before output to its respective speaker. The sound is fairly coherent and even though it is still mono output, the full range of musical fidelity can be appreciated better. It is not audiophile quality but it is very satisfying and I can actually hear more details in the music than with any one of the radios by themselves. Just goes to show you that you CAN teach a new Radio dog old Tricks (LOL)!
Happy Listening,
TomL
I love it, Tom! Thanks for pointing out that sometimes it takes a “stupid radio trick” to really produce some amazing audio fidelity! This reminds me that in the early 90s, I used to have a Zenith Transoceanic and RadioShack DX-440 on my radio table in my room. If I recall correctly, the Zenith was on my left and the DX-440 on the right. I used to tune to shortwave, MW and FM stations and produce a makeshift “stereo” effect by playing both at the same time. Sometimes, on shortwave, it actually helped me discern voices in weak signal work!
 Many thanks to SWLing Post contributor, Moshe, who writes: